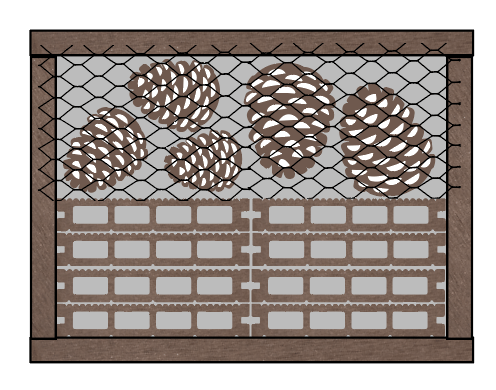
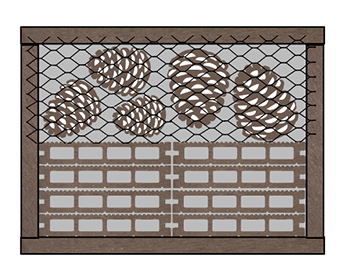
When creating your composite decking area at home, it's likely you will have some offcuts and leftover pieces. As part of our environmental journey we are working hard to reduce our impact on the environment (read more about our environmental journey here) In doing so, we have created some guides on what you can do with your leftover decking. In this guide, we will show you how you can create your own long life and sustainable bug house with offcuts of Cladco composite decking.
To begin making your composite bug house you will need the following items:
- 8 planks of hollow decking cut to 50mm lengths, or you can use your sample pack
- Sumo grip adhesive or screws
- For the frame - 2 planks cut to 350mm in length and 50mm in width
- 2 planks cut to 200mm in length and 50mm in width
- For the back - 2 planks cut to 350mm in length and 125mm in width
- Chicken wire approximately 270x110mm
- 6 Pine cones or natural material
- 9 staples and a hammer
- Hand saw
- Screwdriver
- 16 screws approximately 35mm in length.
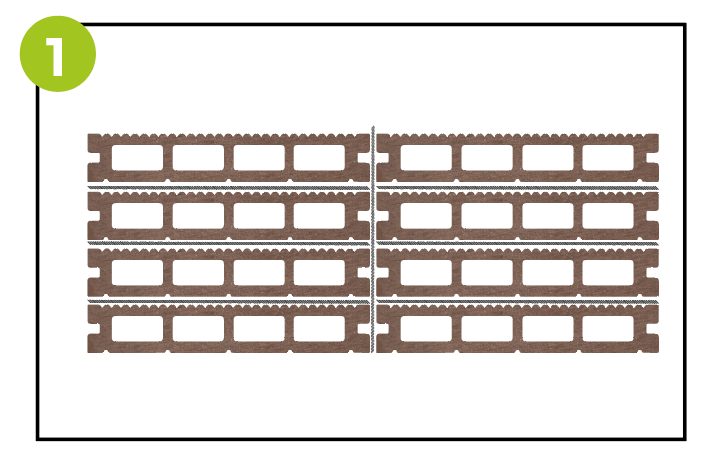
STEP 1: This step will make the honeycomb effect inside the square, for this you can use your leftover sample pack however as one piece is solid you will only have 7 honeycomb slots if using.
Using sumo grip adhesive, glue 4 pieces of composite decking on top of one another, then repeat this step again to do the other side. Once you have your two columns you can glue the two columns together.
It's advisable to place a heavy object on top of the two columns and leave the glue to dry for at least 24 hours.
NOTE: If you haven’t got sumo grip adhesive you can use screws instead, take care if using screws, not to split the decking.
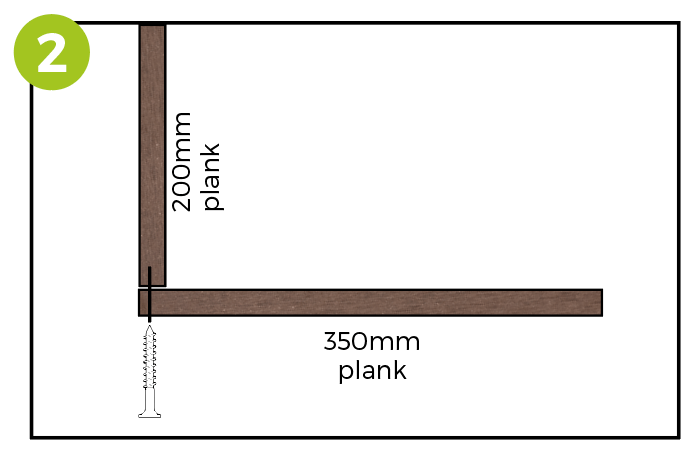
STEP 2: Take your 350mm composite base plank and a 200mm composite plank, use 2 screws to secure on each edge and screw them together to make a corner.
If you do not have screws you can use glue however we advise screws to give additional strength. Take care when drilling through composite so it does not split.
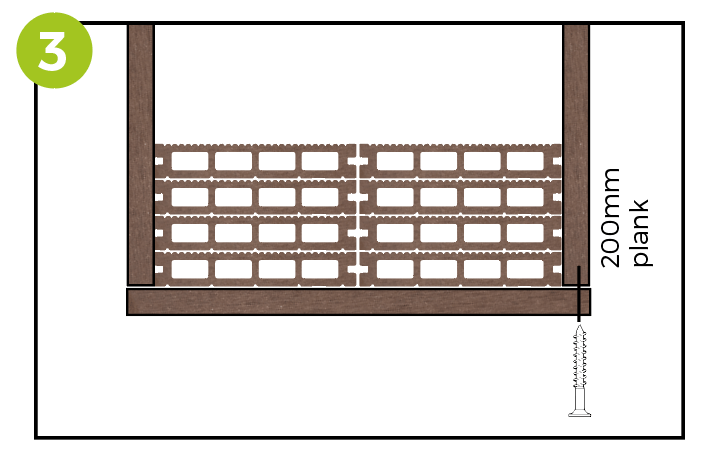
STEP 3: Next, place your dry hollow columns up against the corner and then glue them in place. Please note if your columns have not dried for at least 24 hours we advise you to leave them. The adhesive will need time to set.
Take another of your 200mm composite side planks and using 2 screws, screw them together in each corner
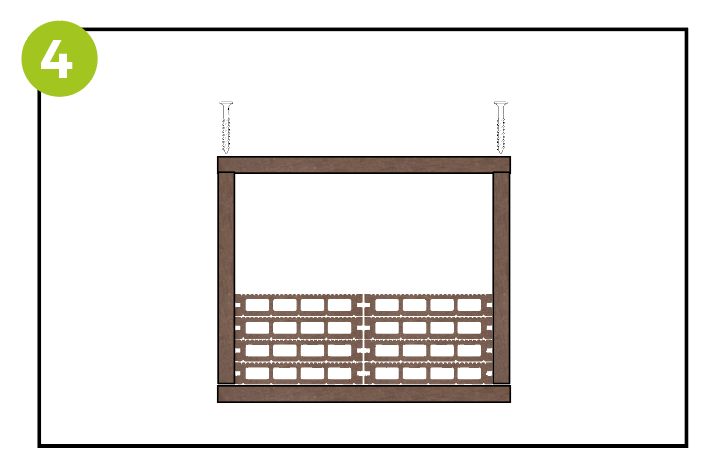
STEP 4: Take the remaining 350mm plank and using 4 screws, screw into each corner. Screw the plank to the top of the bug house.
As before, you can use glue for this step, but using screws will ensure the bug house is stable and secure.
Take care not to split the decking boards when screwing through the material, composite decking is designed to be used with our t-clip system so extra care should be taken if using screws.
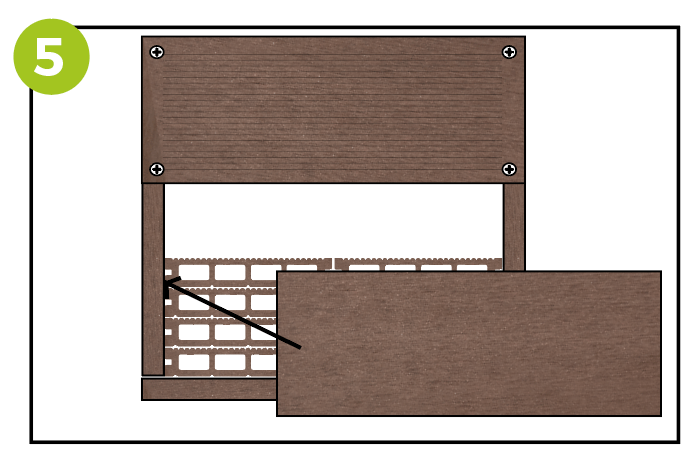
STEP 5: Next, use the two remaining 350mm composite planks and 8 screws to screw the back of the bug house onto the frame.
It’s important to have a back on the bug house to close off the other side for insects to feel secure. If you don't have enough decking for this step you can use timber or prop it against a wall or shed.
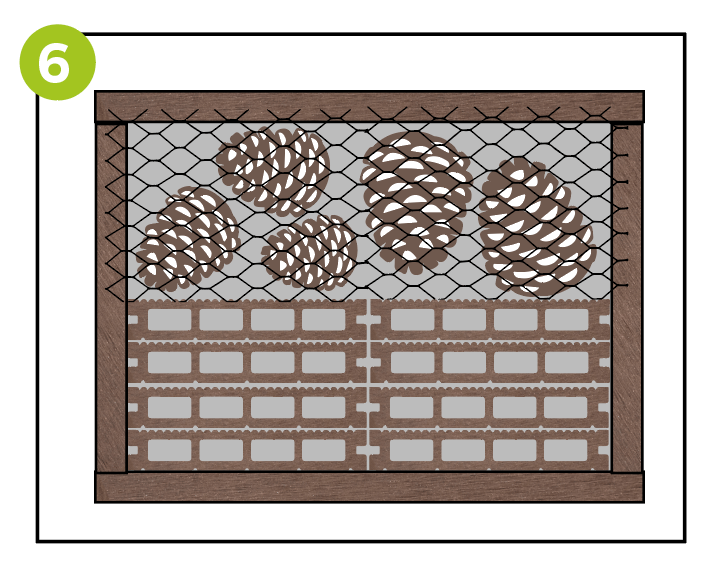
STEP 6: Finally, place pine cones or natural materials into the top area of the bug house and cover it with chicken wire, use staples to secure the wire in place.
NOTE: Be careful when doing this as the wire is very sharp.
Please note this is a guide only and you may need to adjust the measurements to suit your requirements.
We would love to see your creations, send them to us via email at [email protected] or use the hashtag #CladcoRecycled on Instagram.
To download a print version of this guide, please click here

Calculate the cost, number of boards and fixings you may need for your project using the Cladco Composite Cladding Calculator.