Composite Decking
Installation Guide
Contents

Storage And Handling
Cladco Composite Decking Boards should always be stored in a cool shaded spot on a flat and level surface which supports the whole length of the Board.It is recommended to store the Boards on a pallet to ensure they are not sat directly on wet or cold ground.
Wear protective gloves when handling the Boards and take care when lifting them.We recommend that a minimum of two physically capable persons carry the Boards.Always ensure any persons assisting with installation or handling is physically capable.

Colour
Cladco Composite Decking Boards are designed and manufactured to replicate the natural variants of a timber decking board.
It’s recommended to purchase all Boards required for your project at the same time,as this will ensure colour consistency and ensure only one delivery cost.We recommend laying out all the Boards before installation to ensure a natural effect of grain and colour tone is balanced across the whole of your Decking.As with all materials exposed to direct sunlight, some natural weathering may occur over time.

10 Year Guarantee
Cladco Composite Decking Boards should always be stored in a cool shaded spot on a flat and level surface which supports the whole length of the Board.It is recommended to store the Boards on a pallet to ensure they are not sat directly on wet or cold ground.
Wear protective gloves when handling the Boards and take care when lifting them.We recommend that a minimum of two physically capable persons carry the Boards.Always ensure any persons assisting with installation or handling is physically capable.
Tools

Protective Equipment
When handling or carrying Decking Boards, it is advised to wear long sleeves and gloves. When cutting the Boards, we suggest you wear a protective dust mask, ear defenders and safety glasses. Knee pads are recommended to be worn when fitting Decking.

Tool Set
Standard everyday carpentry tools will be needed to complete the installation, including a tape measure,pencil, spacing tools and stanley knife.

Sumogrip Adhesive
We recommend using Sumogrip adhesive to secure the Fascia Boards when concealing a support system beneath.When using the Sumogrip adhesive,do not allow the adhesive to get on the Decking Boards, as this can damage the finish of the deck.

Power Drill or Driver
Standard power drills can be used when installing Composite Decking Boards. A standard Phillips screwdriver bit PH2 x 50mm should be used when working with Speeddekz 65mm Woodscrews and Speeddekz 50mm Screws.

Jigsaw or Handsaw
Composite Decking Boards can be cut using any standard wood cutting tools. We recommend using a fine-toothed blade to get the cleanest finish to your cut edge.

Spirit Level And String
A spirit level is essential when installing Decking Boards to ensure a level support system. A spirit level ensures the Decking Boards are installed along a straight edge. A slight slope will allow for water run-off.
Prepare your base
Choose from two bases
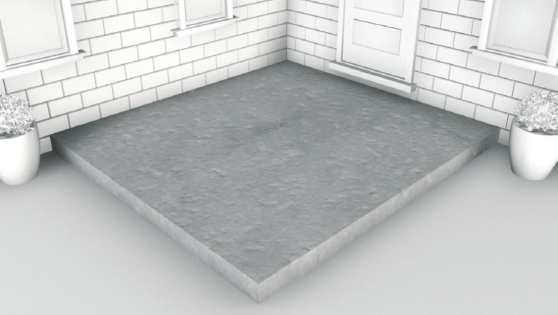
Concrete Base
A 100mm thick concrete base is recommended, with a slight slope for drainage to occur. The optimum slope should be around 5mm for every metre.
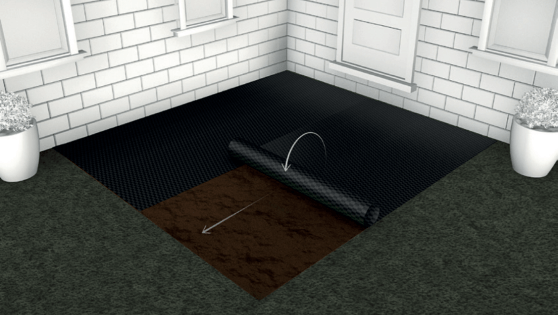
Grass Or Soil Base
Remove the turf or soil until the ground is completely even, ensuring to remove any debris or rocks from the area. Cover the area of your site with a layer of Weed Mat to prevent any weed re-growth coming up under your Decking.
If you need to overlap the Weed Mat, ensure you do this with enough fabric to prevent any gaps. Once cut and pinned into place, cover the Weed Mat with your desired coverage, such as chippings, bark or stones, so that none of the Weed Mat material is exposed.
Airflow
Ensure your substructure design allows for significant airflow and ventilation. If the Decking is being installed on areas with poor ventilation, the Decking substructure must be installed on top of Joists which allow for a 47mm airflow gap.

Timber Framework

1. The maximum recommended space between Joist rows depends on the angle at which you intend to lay your boards in relation to the Joists,but should never exceed 40cm, please see diagram. You will need to double joist where two Boards meet end-to-end. Allow adequate spacing at both parallel edges and butt joints to allow for expansion and contraction. Apply Deck Tape to the top surface and cut ends of the timber joists to protect them from moisture.
2. Starter Clips need to be fixed to the end of the Joists before laying the first Board. Place these at the end of each Joist, leaving a gap of 15mm between the wall and the Starter Clip to allow for expansion.
3. Our Composite Boards are easily fastened to the Joists of a supporting substructure with the help of our Stainless Steel Screw and plastic T-Clip System. Start at the outside of the area to be decked. Place your first Board and fix it to each Joist it crosses using a row of Starter Clips.

4. Slot T-Clips into the groove along the side of the Board and screw them into the supporting Joists with the screws provided, using one T-Clip for each supporting Joist. We recommend you use our Stainless Steel Wood Screws offering increased wear and less corrosion. T-Clips will leave a 7mm gap between Boards.

5. Fit your next Board by sliding it onto the T-Clips used to secure the first Board and fitting another set of T-Clips to secure the opposite side of the Board, using one T-Clip for each supporting Joist. Follow a similar process to fix subsequent Boards. The ends of Boards must be fully supported. No overhang or cantilever is advised.

6. At butt joints – where the ends of two Decking Boards meet – you will need to ensure that each Board is held in place with its own T-Clip where they meet.

Extreme Temperatures
Extreme temperature changes could cause the Boards to expand or contract. Ensure Boards have had sufficient time to acclimatise to the temperature before installing. Do not install in extreme temperatures.

Cutting
If Boards need to be cut to size, ensure the Boards are installed and secured immediately after cutting.

7. Having fastened your Boards, all that remains is to tidy up the sides of your new Deck with our Composite Skirting or Fascia Boards, which can be used to hide the unfinished ends of Boards and supporting Joists.

8. Our Hollow Decking End Caps are used to seal off the ends of Hollow Core Boards to give your Decking a professional finished look. End Caps are available in the same colours as all our Composite Decking Boards. Apply them to neatly complete your Decking project.
HAVE YOU THOUGHT ABOUT TRYING A DIAGONAL PATTERN?
Why not transform your space by installing in a diagonal pattern? This pattern is great for walkways or for the more compact decking areas, as it can elongate the space.
Simply lay the Boards at a 45-degree angle to the Joists, or build the Joists to a 45-degree angle within the frame. When using a diagonal design, the Joists must be no more than 250mm apart.
Composite Frame and Laying Decking Boards

1. Boards must not be laid directly on the ground but should be fixed to the Joists. The maximum recommended space between Joist rows depends on the angle at which you intend to lay your Boards in relation to the Joists, but should never exceed 40cm. You will need to double joist where two Boards meet end-to-end. Composite Joists should be screwed into the concrete base.
Raised Decking Area
Steps and a raised Decking area can be included into your design using upright Timber or Composite Posts to support the raised framework.
This will completely transform your Decking space into a dynamic, relaxing outdoor area.

2. A gap of at least 15mm should be left between the ends of Joists and a fixed object such as a wall, and at least 8mm between the ends of Joists at butt joints. These allow for proper drainage and temperature expansion.

3. A Starter Clip needs to be fixed to the end of the Composite Joists before laying the first Board. Place these at the end of each Joist where you will start to lay your Boards, leaving a gap of 15mm between the wall and the end of the Joist to allow for expansion.

4. Our Composite Boards are easily fastened to the Joists of a supporting substructure with the help of our Stainless Steel Screws and plastic T-Clip System. Start at the outside of the area to be decked. Place your first Board and fix it to each Joist it crosses using a row of Starter Clips.

5. Slot T-Clips into the groove along the side of the Board and screw them into the supporting Joists with the screws provided, using one T-Clip for each supporting Joist. We recommend you use our Stainless Steel Wood Screws offering increased wear and less corrosion. T-Clips will leave a 7mm gap between Boards.

6. Fit your next Board by sliding it onto the T-Clips used to secure the first Board and fitting another set of T-Clips to secure the opposite side of the Board, using one T-Clip for each supporting Joist. Follow a similar process to fix subsequent Boards. The ends of Boards must be fully supported. No overhang or cantilever is advised.

7. At butt ends, where two Decking Boards meet, ensure each Board is held in place with its own T-Clip. Allow adequate spacing at both parallel edges and butt joints to allow for expansion and contraction. Once you get to the end of laying your last Board there are multiple ways of finishing off your Decking area. When using a Hollow Composite Board you will need End Caps to seal the ends of the Boards.
Finishing Your Decking
Bullnose & Fascia Boards
Made with the same material as the Decking Boards, Bullnose, Fascia Boards and Corner Trims can be used to finish your project to a high-end standard.

To Install Your Bullnose Boards
Using Cladco Hidden Deck Fasteners consisting of 65mm Screws, a drill bit and colour Plugs, ensure the Bullnose Board is supported along the entire length of the Board, with a Screw inserted into each Joist. Apply pressure using the supplied drill bit to compress the orange pad onto the surface of the Board to create space for the Plug. The supplied Plug can then be inserted using a rubber mallet to create a flush, hidden finish over the head. One row of Screws is recommended for each Board, inserted 13mm from the edges. We recommend using 11Screws per 4m Board, with a T-Clip to secure internally. Alternatively, use 65mm SPEEDDEKZ Deck Screws inserted at an angle through the supporting Joist underneath the Board.

TO INSTALL YOUR FASCIA OR CORNER TRIMS
Using 50mm SPEEDDEKZ Deck Screws, fix the ends of Fascia Boards or Corner Trims to the Joists or Boards behind. Ensure the Screws are inserted 13mm from the edge of the Fascia Board or Trim. Continue fixing 300mm after each Screw. Alternatively, you can use a strong adhesive (Sumogrip) to secure the Boards or Trims. For optimum results, alternate between Screws and adhesive every 150mm until the Board or Trim is fastened securely.

Fascia Boards
Once the Bullnose Boards have been installed, you may wish to add the matching Fascia Boards to the Decking installation.
Fascia Boards can be fitted to the exposed Joists, hiding the base below and the underside of the deck.

Sumogrip
When using the Sumogrip adhesive, do not allow the adhesive to get on the Decking Boards, as this can damage the finish of the deck.

End Caps
These may be a tight fit, and due to the natural fibres you may need to slightly sand them before placing on the ends of the Boards.Ensure the End Caps are not forced into place as this may cause them to snap.
Aftercare and Maintenance

SNOW AND ICE
Take care when walking over your Decking in extreme weather conditions, such as snow or ice, as this may cause the deck to become slippery.
If using de-icer, ensure that the product contains calcium chloride, as this will not damage Composite Decking. It may leave a slight residue behind, but this can be easily cleaned away. Always check on inconspicuous areas before using any chemicals on Composite Decking.
Do not use grit or sand, as well as metal or plastic spades, on your Decking as they may scratch the surface.

MAINTAINING YOUR COMPOSITE DECK
Cladco Composite Decking has a 10 year guarantee and is stain, scratch and fade resistant. In some cases, pressure washing may be required to remove dirt.
For standard everyday debris such as plants, leaves, berries, animal droppings, simply brush your deck free of any debris.
Discolouration can be caused by chemicals found in everyday household products, such as suntan lotion or insect repellent. Take care when using these products near your Composite Decking.